free site statistics
How to make beer: August 2007

Sunday, August 26, 2007

Why would anyone want to know how to make beer?

My wife asked me this question last night, and I was able to think of a number of reasons why someone would want to make their own beer at home, as opposed to just going to the store and buying whatever commercially available beer happens to be around.

Well, although there are lots of pre-made products in our grocery and big-box stores, we as consumers tend to make a lot of the things we consume, using ingredients purchased at these stores, why should beer be any different?

Brewing beer (or making wine) at home is a hobby, much like cooking any other food or drink product, that requires special equipment, extra time, patience and skill. Arguably, once you have the equipment to make beer, your costs from that point on will be low, and you can enjoy the fact that you will make a product that you will be proud of, and can share with your friends.

Comparing making beer at home to fishing, making beer will come out far more inexpensive and yield a much larger catch, than my favorite of all sports. But, to me, fishing isn't about catching fish, it's about appreciating the outdoors. Catching fish is just a bonus. If I make beer, I know what I'm going to end up with, and don't have to fight mosquitoes to get any.

So, I guess the answer to my wife's question is this:

  • There is no excuse but sheer enjoyment for the pursuit of a hobby

  • To demonstrate your brewing skill and creativity

  • It is fun

  • You can share it with your friends

  • It is a low cost craft or hobby


It's time for a beer.

Saturday, August 18, 2007

How to make beer - Fermentation 101

NOTE: Make sure to read all of these instructions prior to removing the lid on your primary fermenting container.

You've sealed the primary fermentation container and are patiently waiting for your mixture to ferment. Fermentation should be pretty active in the beginning days as evidenced by the continuous stream of bubbles in the airlock. You do not want to contaminate the batch by opening it up too soon, so please be patient. Beer can ferment in the primary fermenting chamber for 10 to 14 days depending on the stability of the ambient temperature.

My recommendation is to wait the full 14 days. The sugars should be fully converted to alcohol and dead yeast should be settling to the bottom of the primary fermenting container.

After sanitizing your hands, siphon hose, mason jar, and hydrometer, you can open the primary fermenter lid, and siphon a small amount of the wort into the mason jar for testing. Ideally, the specific gravity will be between 1.010 and 1.020, but this may also depend on either your kit, recipe, or other instructions.

Secondary fermentation occurs in the bottle. There are a couple methods of priming the secondary fermentation, one is with malt extract "drops", the other is to make a malt extract syrup.

Before making the malt extract syrup, sanitize all 2 quart sauce pan, 20 quart pot, spoons, hosing and racking cane, and hands.

Boil one pint of water in the 2 quart sauce pan, and add either 3/4 to 1 cup corn sugar, or my favorite, 1 1/4 to 1 1/2 cups dried malt extract. The more sugars you provide, the greater the carbonation, so make your first batch with a lower concentration of sugars. Pour this into the sanitized 20 quart pot.

Without disturbing the primary fermentation container or carboy, open the lid, and begin syphoning the wort into the 20 quart pot. It helps if the primary fermentation container is slightly elevated, and the 20 quart pot is lower, to take advantage of gravity during this phase.

NOTE: When siphoning, keep the high end of the hose above the sediments, unless you want a "hearty" beer.

The flat beer will mix with the primer solution as it is siphoned into the pot, but you can also stir gently to ensure complete mixing.

It's time to bottle your beer. A special beer bottle filling hose attachment will rest on the bottom of the bottle as the beer flows through. Fill to the top of the bottle, and the fluid level will decrease when the filling hose is removed. Fill and cap each bottle immediately.

NOTE: Document in your brewers journal, the date and time of bottling.

Secondary fermentation will complete the beer making process after another 14 or more days. Aging the beer a couple months can improve the taste, so remain patient. Your beer will be worth the effort and something you can share with friends and family.

Friday, August 17, 2007

How to make beer - Brewing 101

There are basically four phases in brewing beer, each phase broken down into smaller steps, but it is important to remember to follow the steps, especially of any custom recipe with patience and precision or your beer will not turn out as you might hope. We will go over the process for cooking or brewing your beer using the cheat of malt extract. You can make your own mashed malt, and I will discuss this in a future article, but for now, we'll keep things simple at first just to practice the procedure of making beer, and getting the experience of our first batch under way.

NOTE: Start your training and continue your beer making hobby with copious note taking. Write down everything. Write down the date and time you perform each task. Write the amounts of each ingredient down.

Start with a simple beer first, here is a sample...

Amber Ale

8# pale malt extract
1# 60L Crystal
1/2 # Carapils
1 oz Challenger (7.9%) 60 min
1 oz Challenger 5 min
Ferment with W.L. California Ale Yeast

If you bought a beer making kit, you will want to follow the specific instructions provided with the kit. Otherwise, read on my eager fellow beer maker.

Starting with sterilized 20 quart boiling pot, stirring spoon (2 foot steel spoon), tablespoon, pyrex measuring cup, mason jar, thermometer, and five gallon glass primary fermenting container or plastic carboy and an airlock for your fermenting container. These parts can all be sterilized by either boiling for 20 minutes, or using a bleach based bath to soak these items for 20 minutes. If you use a sanitizing product, be sure to rinse these parts thoroughly with clean/boiled water before use. Also, use a good hand sanitizer for your hands before touching anything. You need to ensure the surfaces which touch your beer, yeast, grains or water is sterile at all times, so be careful what you touch and try to maintain some awareness to your kit.

All great brews start with great tasting water. If your water is not of good quality, you can use bottled water, but you will typically start with 1.5 Gallons of water for your first batch. Other recipes may call for more water, and that's OK too, just watch your recipe for details.

NOTE: Keep a gallon or so of warm pre-boiled water on hand for a number of tasks, including re-hydrating the yeast, rinsing utensils, and cleaning later.

We're now going to make wort (wurt). This is the basis for your beer. Bring 1.5 gallons of water to a boil in the 20 quart pot on your stove.

While your water is heating, it's time to rehydrate the brewers yeast. The yeast selected is important to the taste of your beer and must you must be very careful to do this with viable yeast and keep the temperatures within the specified tolerance levels or it will either not ferment or will die from too much heat. So...Put 1 cup of warm (95-105°F, 35-40°C), pre-boiled water into your sanitized jar and stir in the yeast. Cover with plastic wrap and wait 15 minutes.

Proofing the yeast is required to ensure the yeast is alive. This is done by boiling 1/4 cup of water and adding 1 teaspoon of malt extract, which is set aside to cool. Once cool, you can pour it into your yeast jar and observe for any activity, churning or foaming action. If nothing happens, your yeast is dead and you should try these steps again with fresh yeast and keeping an eye on your temperatures.

Once your water is boiling, it is time to add the malt extract. Turn off the burner before adding the malt extract, to prevent sudden boil overs. Gently stir the malt into your water to ensure a complete mixing of malt and water. Once you are convinced the malt is completely dissolved, add your hops and turn the burner back on to bring the wort to a boil. Continue stirring your wort to prevent boil overs for one hour (unless your recipe calls for less or more time). Unhopped malts may require more boil time than hopped malts.

Take the wort off the burner and cool to a yeast pitching temperature (65-90 °F [18-32 °C]) by placing the boiling pot into a tub of ice water. You want to prepare the wort for the yeast, without killing the yeast in the process.

NOTE: Sanitize your fermentation bucket or carboy, strainer, air lock, and siphon before continuing.

We are now ready to start the fermentation process. Fermentation is the the conversion of carbohydrates into alcohols or acids under anaerobic conditions used for making certain foods. Fermentation begins when we Pitch the yeast into the wort. Pour your yeast solution into the fermentation bucket/carboy followed by the wort. Take care to pour the wort into the fermentation container through a strainer to catch any hops and top help aerate the yeast.

Find a warm 65-70 °F (18-21 °C), temperature and light stable environment for storing your fermentation bucket, then seal the container. The airlock should be firmly in place and you will begin to see evidence of fermentation within 24-48 hours. Allow the fermentation to continue for a minimum of two weeks or longer depending upon your tastes and ingredients. The sugars need to be completely fermented, and particles in your wort must settle to clear the mixture. The more time you allow at this phase, the clearer your beer will be, but a cloudy beer does not mean bad tasting brew. Experiment with various durations of fermentation after this batch.

Finally, thoroughly clean and sterilize all of your cooking utensils, pots, and other equipment, and stove.

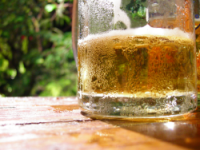
Go have a beer, you deserve it. You'll get to sample your own soon enough.

Wednesday, August 15, 2007

How to make beer - before you brew

Learning how to brew beer can be a fun and exciting culinary challenge. Before you get started though you will want to do some homework so you set your expectations right from the start.
You may also want to practice a little patience, and precision when learning how to brew.

The first expectation you should have is that the brewing process can easily take four (4) or more weeks before you can drink your beer.

Let's start our pre-season lessons on how to make beer with research. What kind of research? Well, simply getting our hands, eyes and taste buds on anything beer. Find internet sites like this one, as well as books from your local library, microbrewery, book store or internet venue to get an idea of what is involved in making beer.

My favorite part of this kind of research is trying to decide what type of beer we will make first (or next), and this is up to your individual taste preferences, creativity and skill levels.

Next we will want to research some beer making equipment. As with any hobby or passion, you will get out of this experience what you put into it. That being said, you can start off with an inexpensive kit from MrBeer.com or other supply house to learn the basic techniques, then graduate to larger volume kits or who knows - go pro and open your own microbrewery.

Finally, you will want to determine the ingredients for your chosen beer, bearing in mind the volume of beer you wish to make. This is where your tastes, creativity and the by the book recipie approach works for us. Almost all beers start the same way, its how you mix the grains that matter for the final product.

Do your research, and shop around before proceeding to the next steps. We will tackle one thing at a time and in the end there will be a nice process to bring you to hops heaven.

How to make beer

Learning how to make beer can a great hobby and culinary achievement for the home brewing enthusiast and microbrewery operators that has a long tradition which can be both fun and refreshingly rewarding. The process is flexible allowing you to make your brew to your taste, and is highly repeatable if want to make more from the same recipe.

Finding the right equipment and ingredients are key to your success. I've assembled a list of list of beer and wine supply companies where you can get great deals on quality ingredients, brewing equipment, wine making equipment, bottles, labels, books and other sundry items for home and micro brewing.

Making Your Own Beer

by Lee Dobbins

While beer is widely available mostly anywhere and there are thousands of varieties to choose from, making your own beer can be an exciting hobby. Your quest to look for the right kind of beer for your taste might be such a confusing journey as there are thousands of varieties out there. Perhaps making your own beer is the good way to speed up your pursuit. Making beer is simple if you follow every step religiously. Here’s an overview of how to do it.

Read the entire article Making Your Own Beer | ho...